
Hi everyone! This updated blog post will explain what Distress Spacers are and show how to set them up! These spacers keep the Distress Ink Pads from falling too far back into the organizer cubbies. They also make it easy for the ink pads to be grabbed. Each spacer kit contains 30 distress spacers.
Whether this is your first time reading about Distress Spacers, or you've come to this blog post to see pictures on how to set them up, keep reading to learn more about these helpful spacers.
![]()
Here is what the Distress Pad Spacers look like. (without the writing...we just wrote that for you to see the size) Each Spacer is made out of thin chip board and is easy to fold....which you will need to do once you're ready for set up.
Fun fact: you can also hand make these yourselves! This is the size you would need to use. Cereal box cardboard is a tiny bit thinner than the material we use, so you could use that as a reference. However, you could use whatever material that's available....maybe even some cardstock paper!

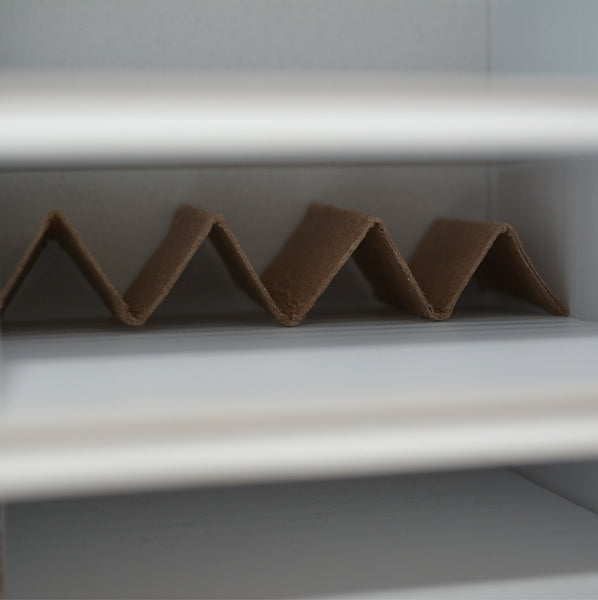
Step 1: Fold each spacer in an accordion fashion four or five times. This will allow the spacers to easily fit in the compact cubbies. You can start the accordion folding from the middle or from either end. It's whatever is easier for you, as long as you create an accordion.

This is what it should look like once the accordion fold has been completed.
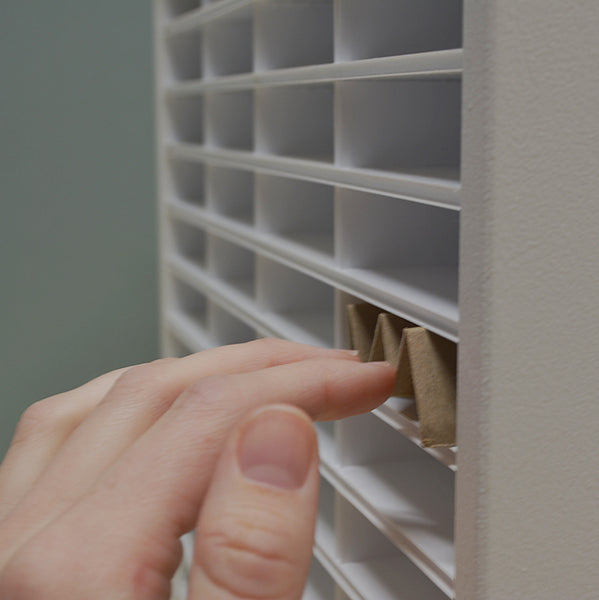
Step 2: Now you can place the chipboard in the cubby.

Note: Make sure to slide it all the way to the back of the organizer.
Step 3: This "accordion fold" is ideal for keeping the stability of the chipboard. The pressure from the "zig zag" position will keep the chip board in place and very sturdy when you push an ink pad against it. And once it's pushed to the back of the organizer, you're all done! This will be the blocker so the Distress Ink Pads don't slide back too far.

Here is a close up of what the organizer will look like once the chip board is all set up!
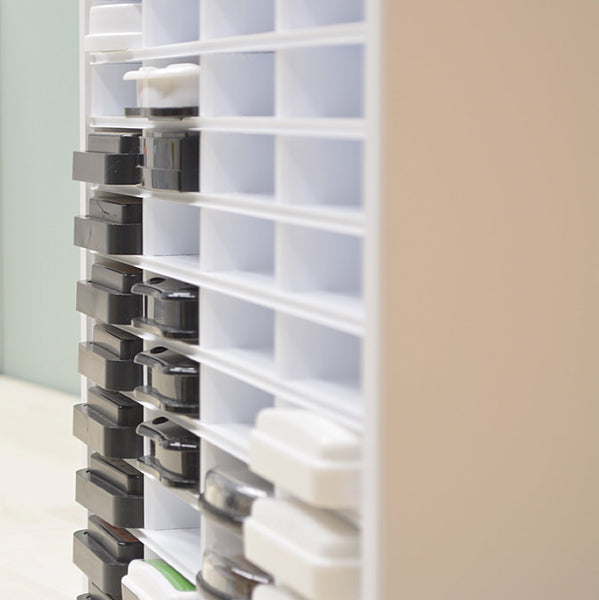
Once the Distress Ink Pad is in the back of the organizer, the ink pad hangs off the organizer perfectly and can be easily pulled out.
Here is the final result! The Distress Ink Pads, along with the Distress Pad Spacer Kit, make your organizer look finished and complete.
Happy Organizing!
8 comments